Support Forum
How to Create and Manage CRM Segments - Wed - Aug 5, 2026 - 9:31am
-
 Segments help you organize patrons into targeted groups based on their activity, purchase history, donations, engagement, and other criteria. They make it easier to send relevant communications to the right patrons without rebuilding the same search each time.How to Create a Segment
- Go to Patron Database.
- Select CRM & Mass Mail.
- Filter your patron list using the criteria you need.
You can combine multiple filters to create a very specific group. For example:- Patrons with a Lifecycle Stage of Lapsing and an RFM Segment of At Risk
- Patrons who have donated at least three times within the last six months
- Patrons who purchased last season’s package but have not yet purchased this season’s package
- Patrons who attended a specific event but have not purchased tickets for an upcoming event
- Patrons who have purchased multiple times but have never made a donation
- Patrons who have not purchased within the last year
4. Once your filters are set, click Save as Segment in the upper-right corner of the screen.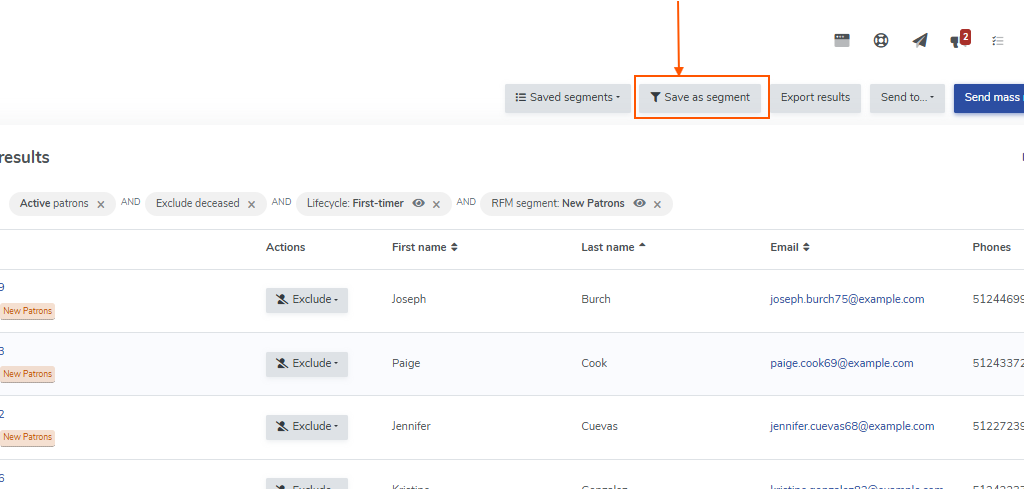
5. Enter a segment name and description.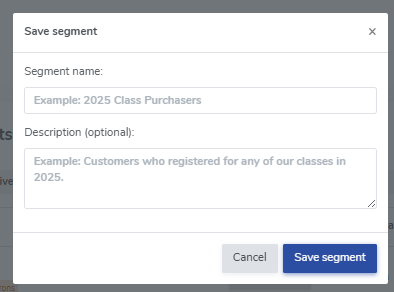 Use a clear name that will make the segment easy to identify later. The description can explain the filters used or the purpose of the segment.
6. Click Saved Segments to view and access all of your saved segments.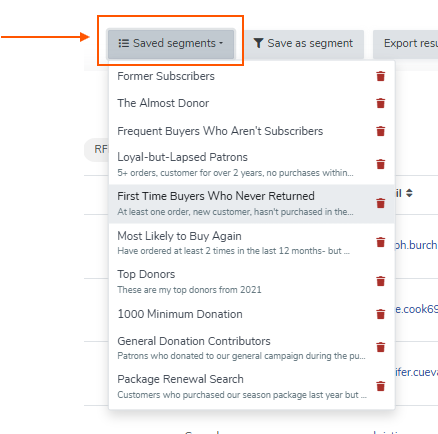 Saved Segments act as shortcuts to searches you use regularly, so you do not need to rebuild the same filters each time.
 Tip: Some searches require a date range. The date range will be saved as part of the segment. After opening the saved segment, you can update the dates before using the list.Why Use Segments?Segments help you communicate with patrons in a more targeted and meaningful way. Instead of sending the same message to your entire database, you can create groups based on patron behavior and send information that is more relevant to them.Segments can help you:
- Promote season packages to patrons who purchased last year but have not renewed
- Reach out to donors based on their donation history
- Reconnect with patrons who have not purchased recently
- Send event recommendations based on previous attendance
- Target your most engaged or highest-value patrons
- Create follow-up lists for specific campaigns
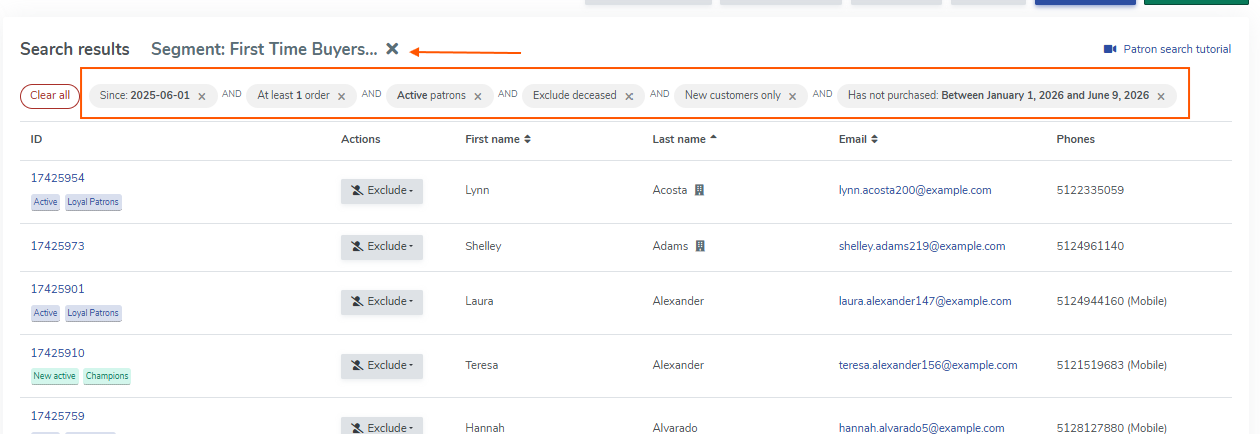
Saved Segments also save time because you can quickly reopen frequently used searches instead of recreating the filters each time.How to Exclude a Patron from a SegmentImportant: A search must be saved as a segment before you can exclude a patron from it. Patrons cannot be excluded from an unsaved search.If a patron appears in a segment but should not be included, you can exclude them from that specific segment.- Open the saved segment.
- Find the patron you want to remove.
- Click Exclude in the Actions column next to the patron’s name.
The patron will now be excluded from that specific segment.You can also view all segments from which a patron has been excluded.- Open the patron’s profile.
- Scroll down to the Segment Exclusions section.
This section will display all of the segments from which the patron is currently excluded. - Go to Patron Database.


View our video tutorials
Why can't all users see the patron database?
Is there a way to quickly recall a customer's info in case we need to call them?
Which customers get entered into the Customer Database?
How can I obtain customer data for those who have opted into our mailing list?
Is it possible to sort the guest list by the zip code from each order?
Customer Comments:
How do I disable the Auto-Fill feature on my account?
