Support Forum
Guide to Creating Mass Mail Templates - Mon - Sep 2, 2024 - 10:59am
-
 Mass email is directly integrated into ThunderTix and takes advantage of the data held in your patron database and events to send targeted mail.
If you use ThunderTix to send mass emails to your customers, you'll need to ensure that you've upgraded to add Email branding to your account.In order to ensure that mass emails actually reach the Inbox of your customers (without being marked as spam), all mass emails need to be sent from your own company domain name. More about this upgrade can be read here:
Domain authentication for branded sending and improved deliverability
1. Mass Mail in ThunderTix can be accessed from three different places: your Patron Database, Events, and Packages. For additional instruction on how to access and manage Mass Mail from each of these locations, please see this discussion.
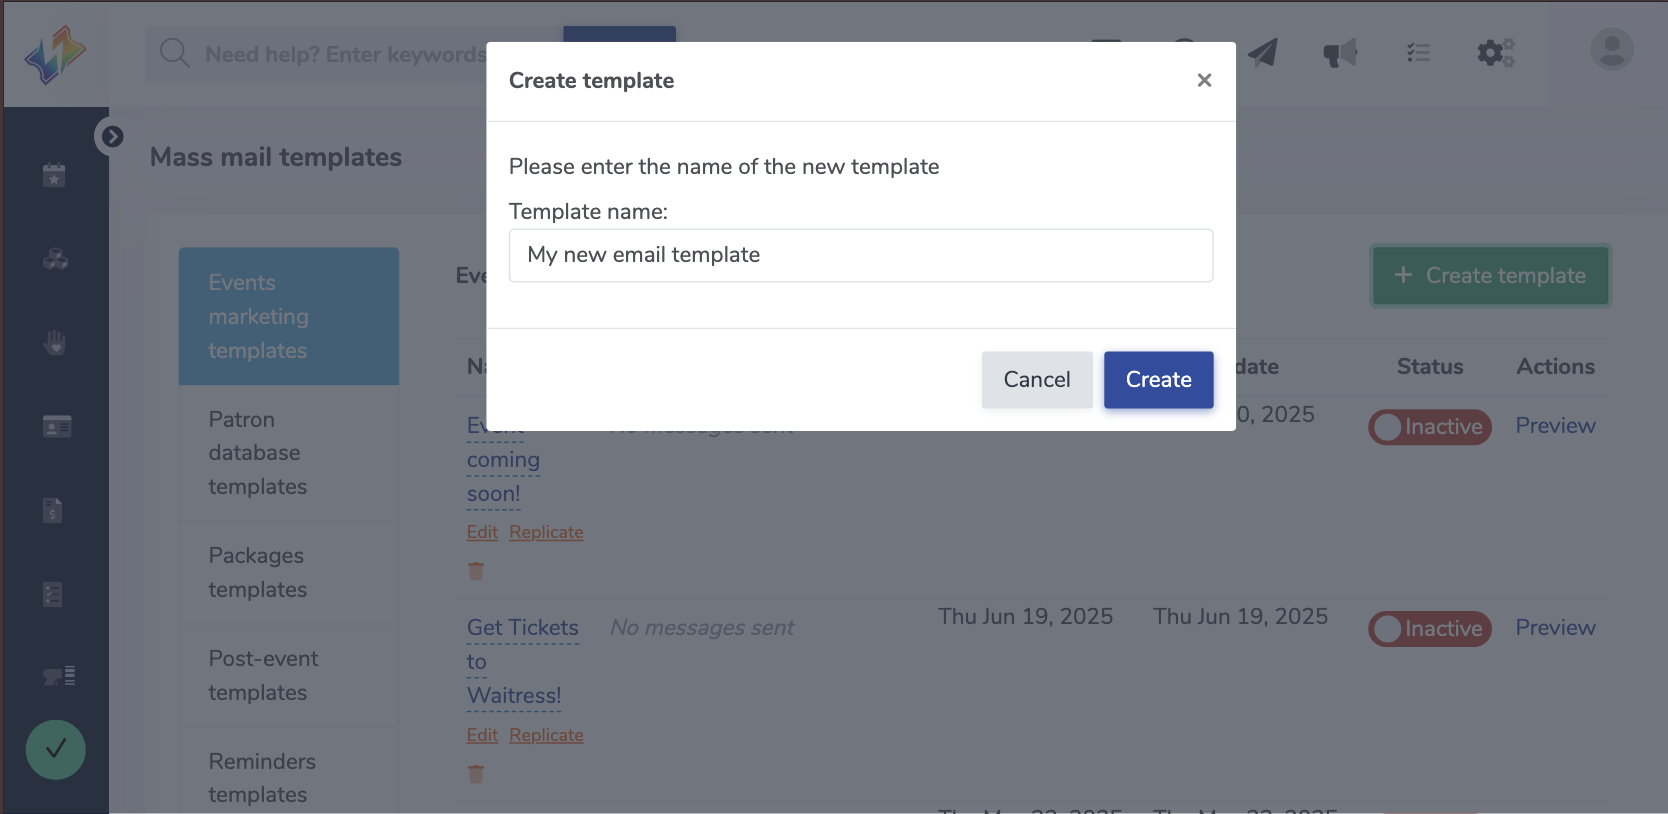
2. Once you have chosen where you want to send a mass email from (your Patron Database, Events, or Packages), you will be prompted to use or create a new template. A template is a design that holds information such as URLs, images or text content. We'll get started by naming our template, so we can find it easily in the future, then click "Create".
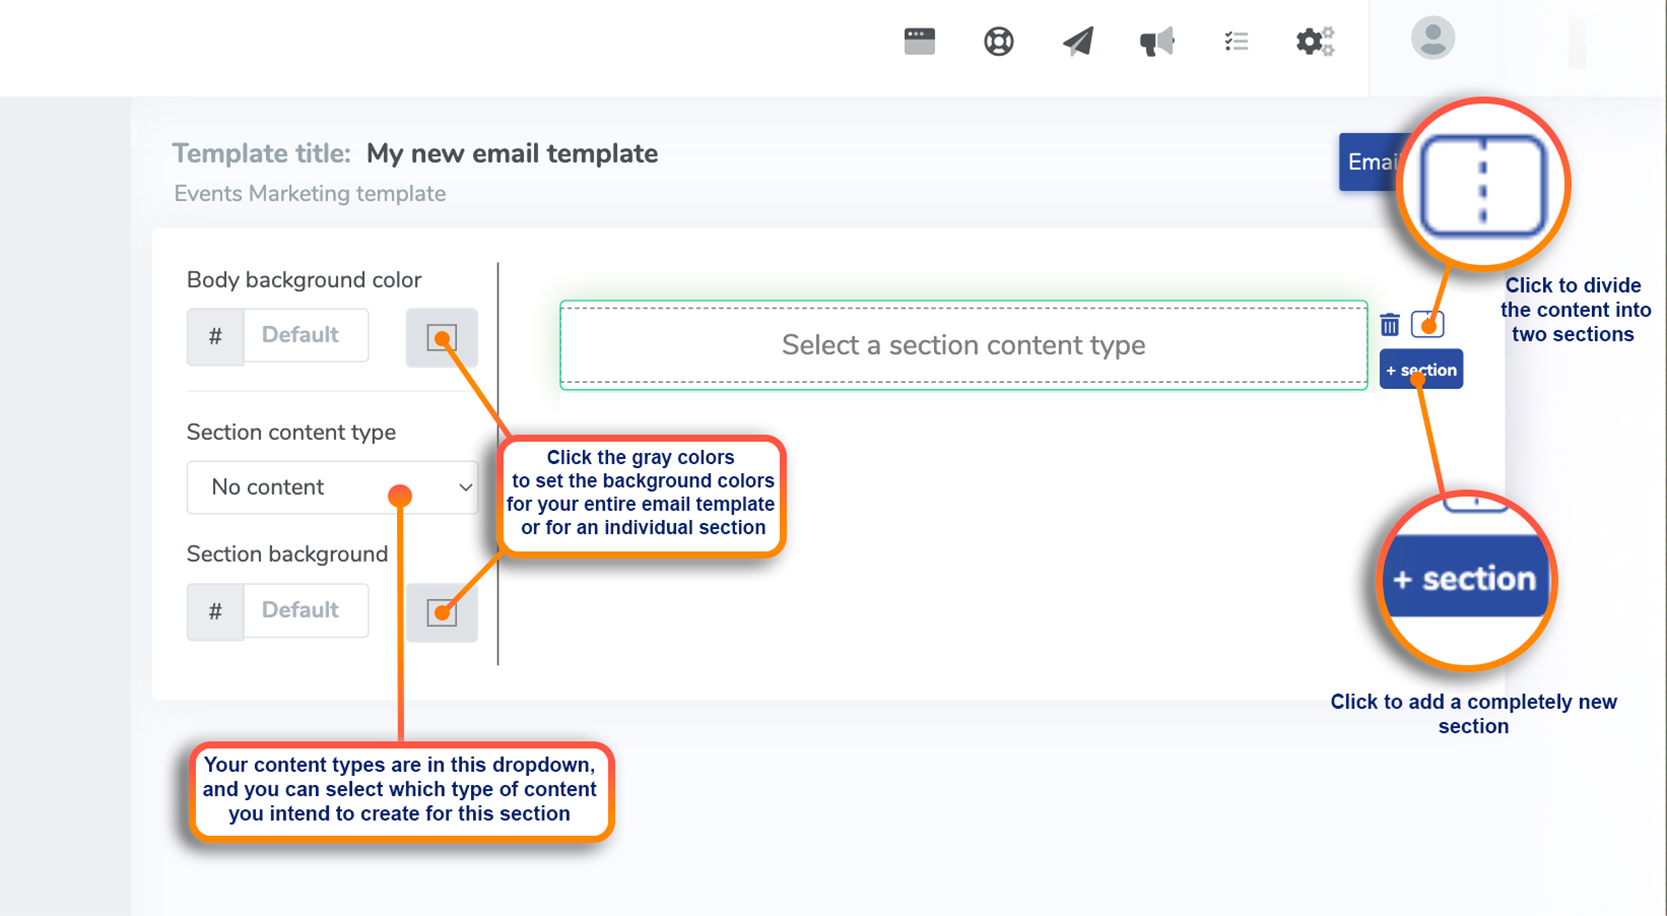
3. Below, we've highlighted some of the important parts of your template such as adding sections and dividers, creating background and section colors, and content types (image, custom text, social links, etc.)
4. Here we've created two rows using the + section button, and the first row has two sections.
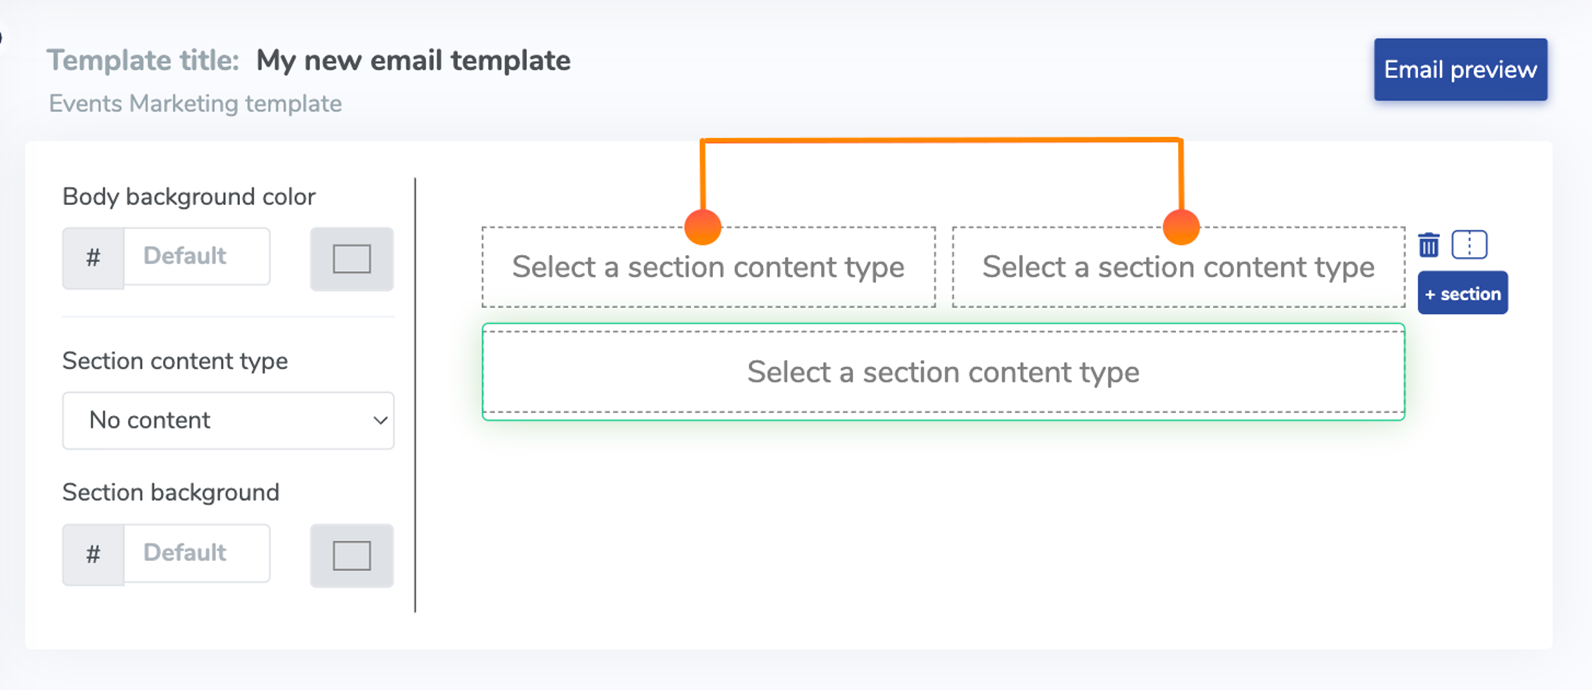
5. Click any of the three areas to highlight it in green as shown above. Please note that you will need to click on each section to edit it. Let's click the first half of row one to add a logo by selecting "Image" in Section Content Type.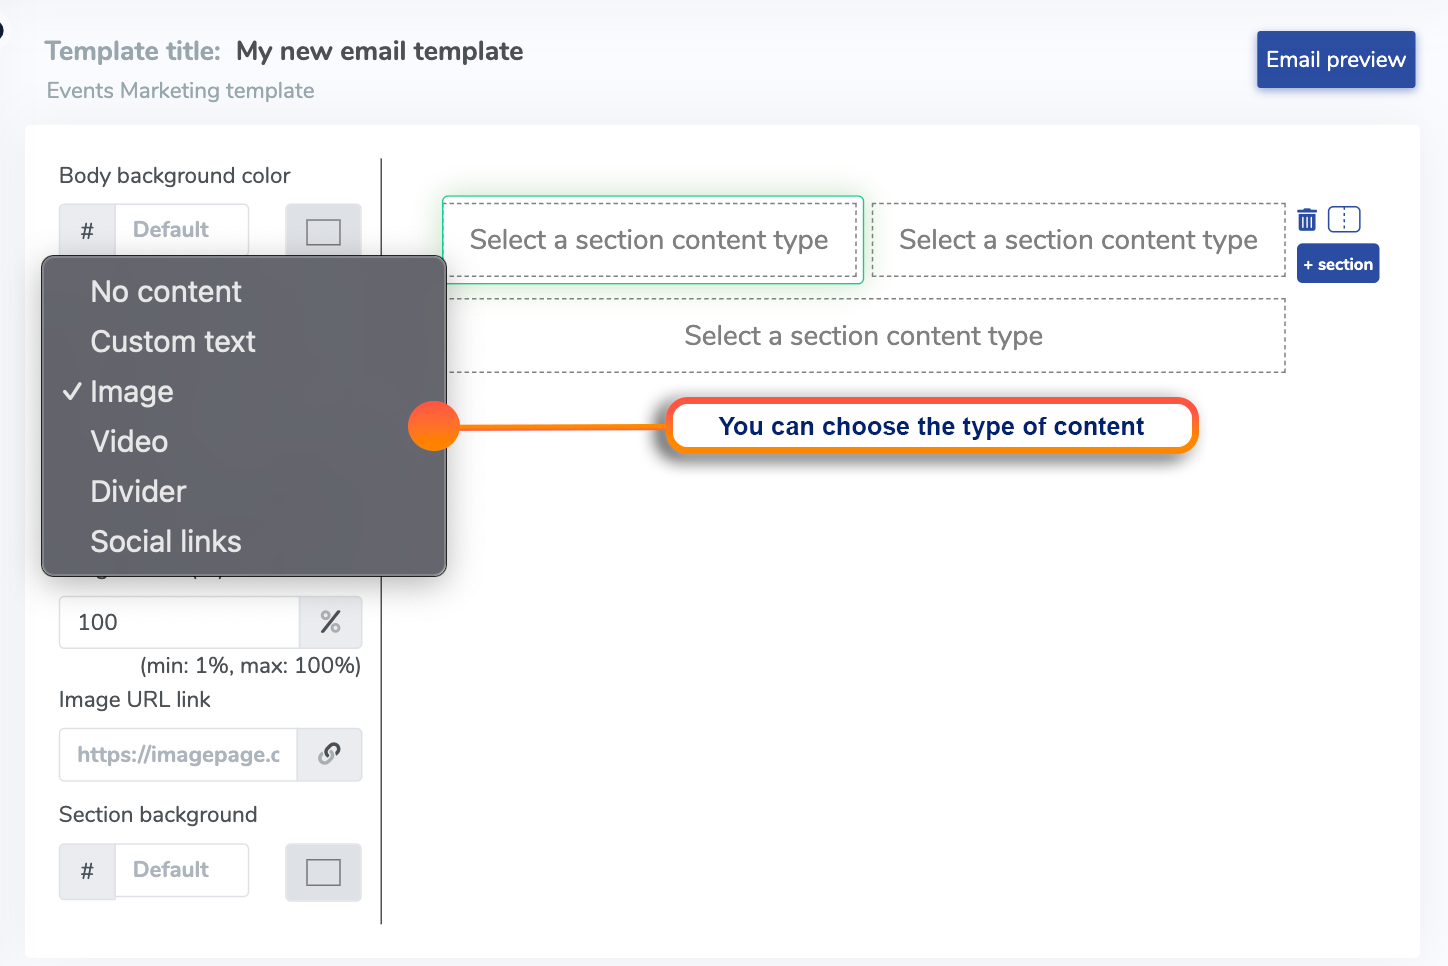
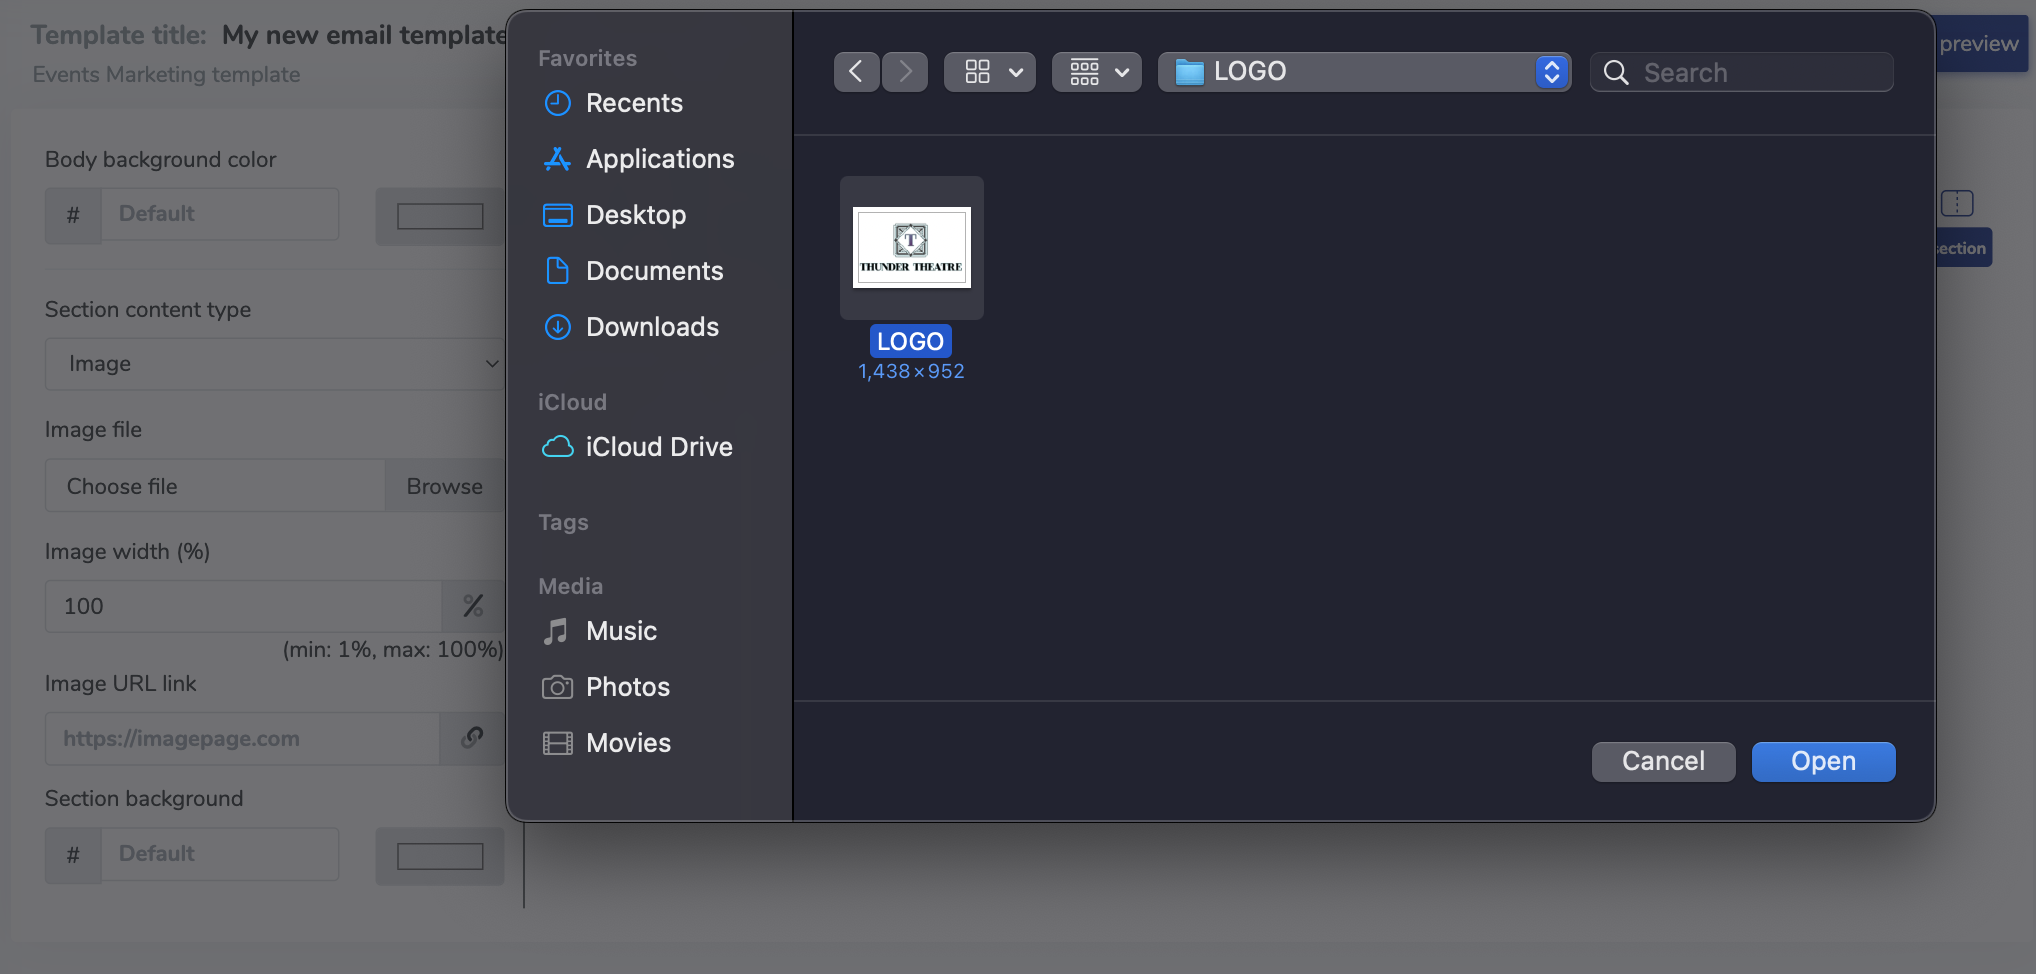
6. Click "Browse" to search your local computer for an image. You can also reduce the size as a percentage of your original image and add a link to your image (See more below.)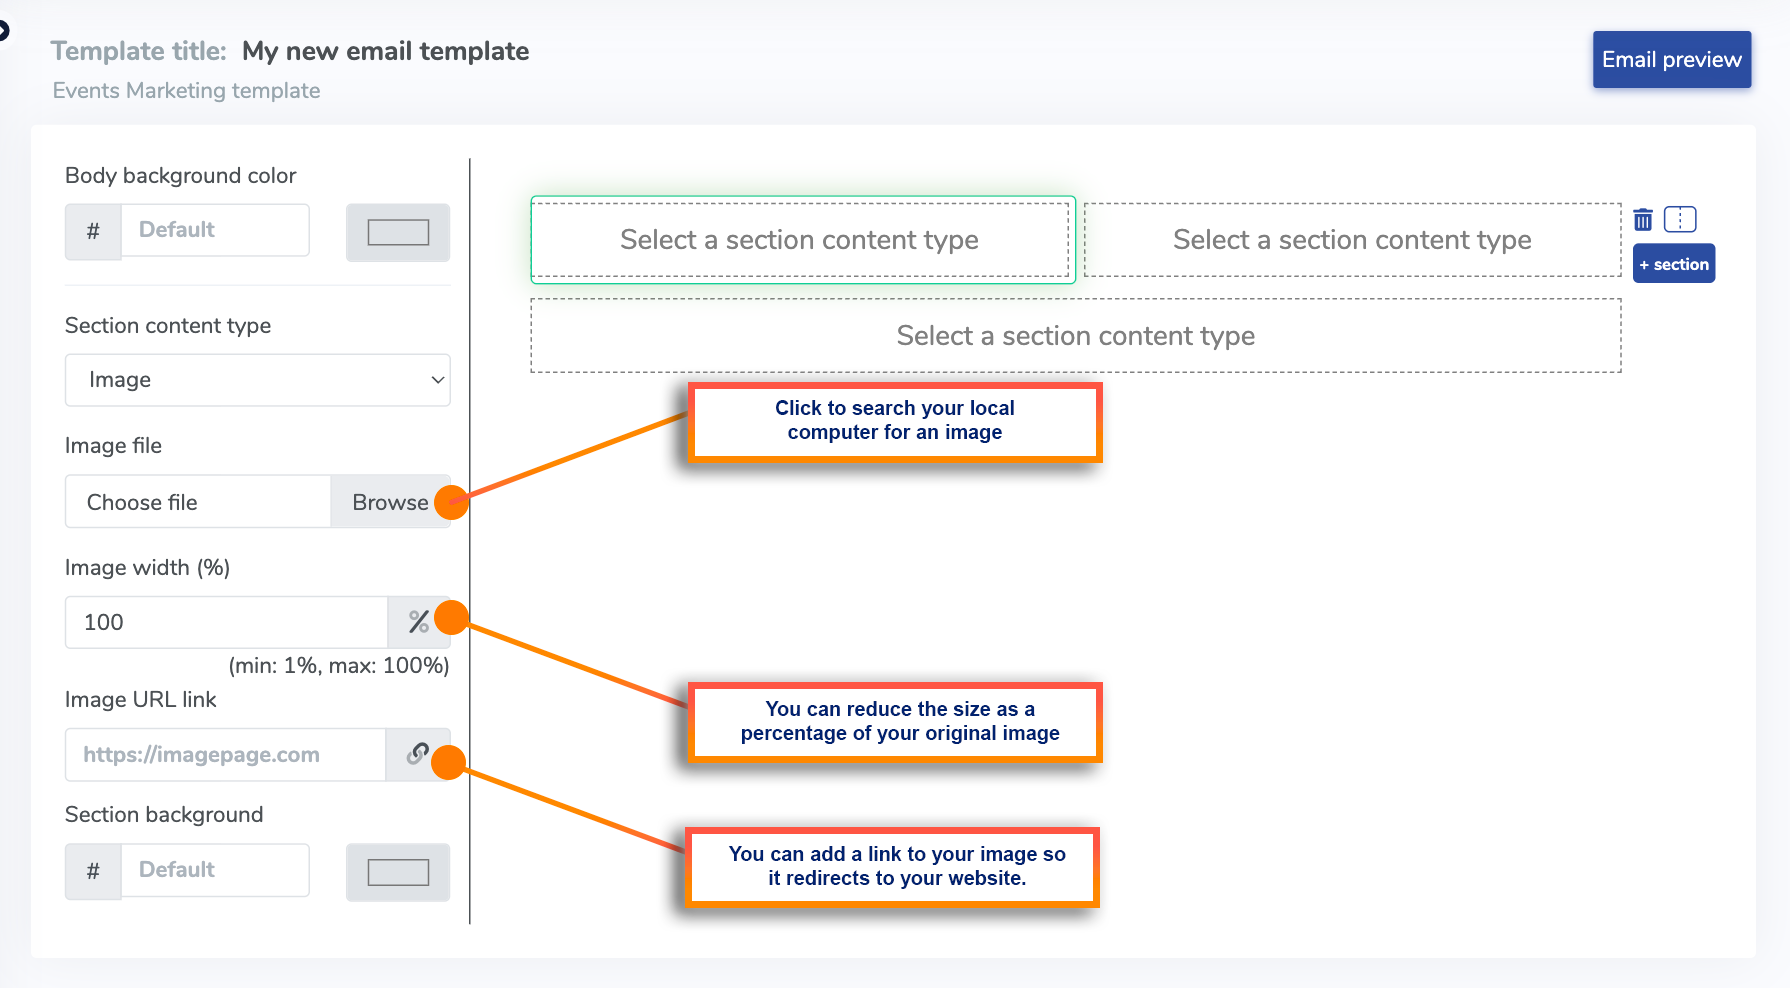
Below you'll see two images. One is the original saved at 100%, and the second is saved at 50%. You can adjust the size of the photo at anytime by increasing or decreasing the percentage.

7. Find your image and click open. Make sure that you click 'Save Changes' in your Section content.
8. Your image will now appear in your selected area.
9. Continue with each of your sections to finish your email content.
11. Once you are finished with your email, or at any time you'd like to see the email itself, simply click the "Email preview" button.

You also have the option to send yourself a preview email. Simply enter your email address and click "Send Preview". Allow ten minutes to receive the email, although in most cases, you'll receive it immediately.

Rinse and repeat!
Mass Mail in ThunderTix can be accessed from three different places: your Patron Database, Events, and Packages. For additional instruction on how to manage Mass Mail from each of these location, please see this discussion.
View our video tutorials
How can I change the name shown for the mailing list?
How do Surveys work?
How do I use Google Analytics to track my ThunderTix website traffic?
How do I set up a Goal in my Google Analytics account to track sales?
How do I track sales for online advertising?
How can I connect my Mailchimp account to ThunderTix?
Constant Contact Integration